Agent
The Agent step allows you to integrate advanced AI agent capabilities into your conversational flows. This step leverages an agentic framework, which enables the AI to reason, plan, and execute tasks by breaking down complex goals into smaller, manageable steps. Instead of rigidly following a predefined path, an agent can dynamically decide the best course of action, converse with the user to gather necessary information, and utilize various tools (functions) to achieve its objectives. This makes your AI Agent more adaptable and capable of handling complex, multi-turn interactions.
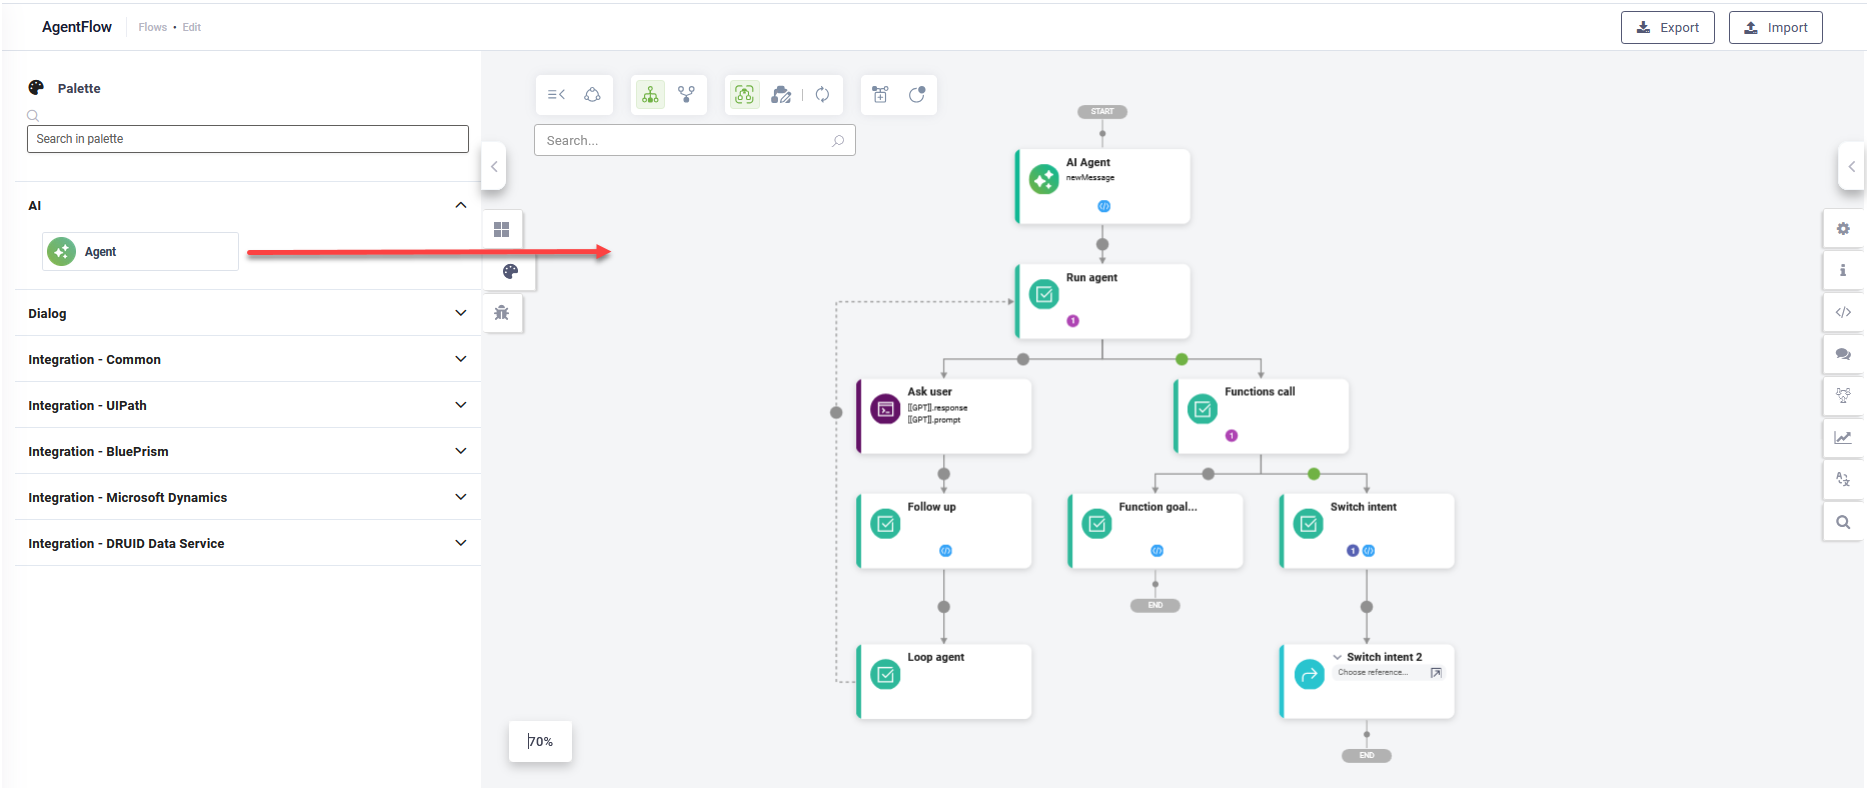
To add an Agent step, navigate to the Flow Palette, click on the AI section, and then drag and drop the Agent step onto your Flow Diagram.
What the Agentic Flow Step Does
The Agent flow step provides a pre-configured structure for defining and managing an AI agent's behavior within your AI Agent. By default, it contains the following key components:
- Agent AI step: This is where you define the core intelligence of your agent. You provide initial instructions and context (the system prompt) that guide the agent's behavior. Crucially, you also define the functions (tools) the agent can utilize to accomplish its tasks.
- Run Agent step: This represents the actual execution of the agent. When this step is reached in your flow, the agent takes over, engaging in a dynamic process of conversation and function execution.
- Conversational branch: This branch handles interactions where the agent needs to talk to the user to gather information, clarify intent, or provide responses. The agent will engage in a back-and-forth dialogue until it has sufficient information to proceed.
- Functions Call branch: This branch is triggered when the agent decides to execute the functions you've defined in the Agent AI step. These functions can perform various actions, such as fetching data, calling external APIs, or processing information.
How it works
When the ‘Run agent’ step is executed, the AI Agent initially prioritizes gathering information from the user through the conversational branch. Once the agent has sufficient information, it proceeds to execute the defined functions via the 'Functions call' branch. The results of these functions are then returned to the ‘Run agent’ step, allowing the agent to decide its next action, whether to continue the conversation, execute functions, or conclude its task.
- Function goal achieved: When the agent successfully completes its objective, it executes this step, signifying the completion of the agentic flow.
- Switch intent: If the user's input indicates a shift in conversational topic or intent during the agent's operation, this step is triggered, allowing you to transition to a different flow or handle the new intent appropriately.
When to Use the Agent Step
The Agent flow step is ideal for scenarios in Druid flow authoring where:
- Complex information gathering is required: When your AI Agent needs to collect multiple pieces of information from the user, potentially across several turns, and in a non-linear fashion.
- Dynamic decision-making is needed: If the AI Agent path isn't strictly linear and depends on user input, external data, or the results of various operations.
- Integration with external tools/APIs: When your AI Agent needs to perform actions beyond simple responses, such as looking up data, making reservations, or processing requests through external systems.
- Handling ambiguity and partial Information: AI Agents are better equipped to handle situations where user input is incomplete or unclear, prompting for missing details rather than failing.
- Creating more natural and flexible conversations: By allowing the AI Agentto lead the conversation and adapt to user needs, the user experience becomes more fluid.
Use Cases
- Booking Systems: An AI Agent can gather details for flights, hotels, or appointments, confirm availability, and process bookings.
- Customer Support: An AI Agent can help users troubleshoot issues, provide information from a knowledge base, or escalate to a human agent when necessary.
- Data Retrieval and Processing: An AI Agent can collect parameters from a user, query a database or API, and present the results in a structured manner.
- Personalized Recommendations: An AI Agent can ask about user preferences and provide tailored recommendations for products, services, or content.
How to set up the Agent step
Step 1: Configure the AI Agent step
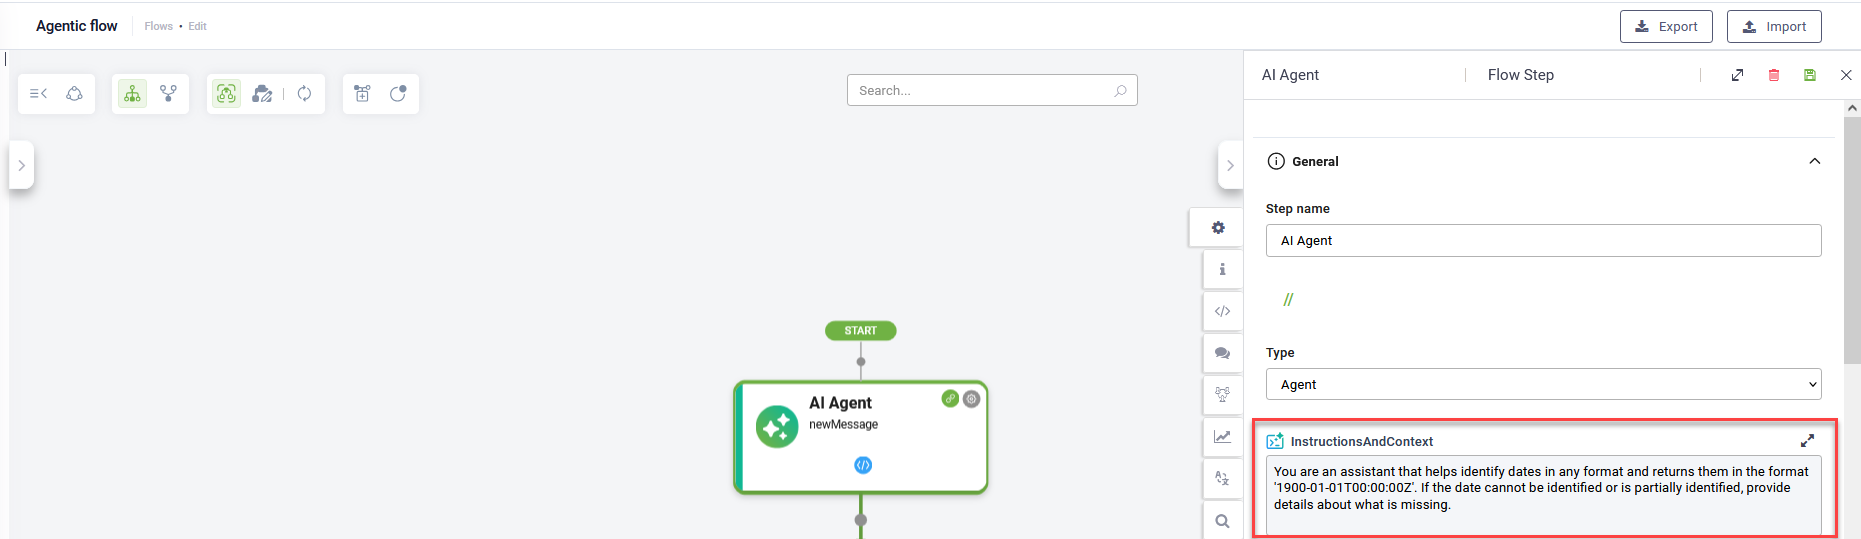
Click on Settings icon of the AI Agent step and configure the step as follows:
- Click on the General section.
- In the Instructions and Context field, define the agent's persona, its goal, and any general rules it should follow. This initial prompt sets the stage for the agent's behavior.
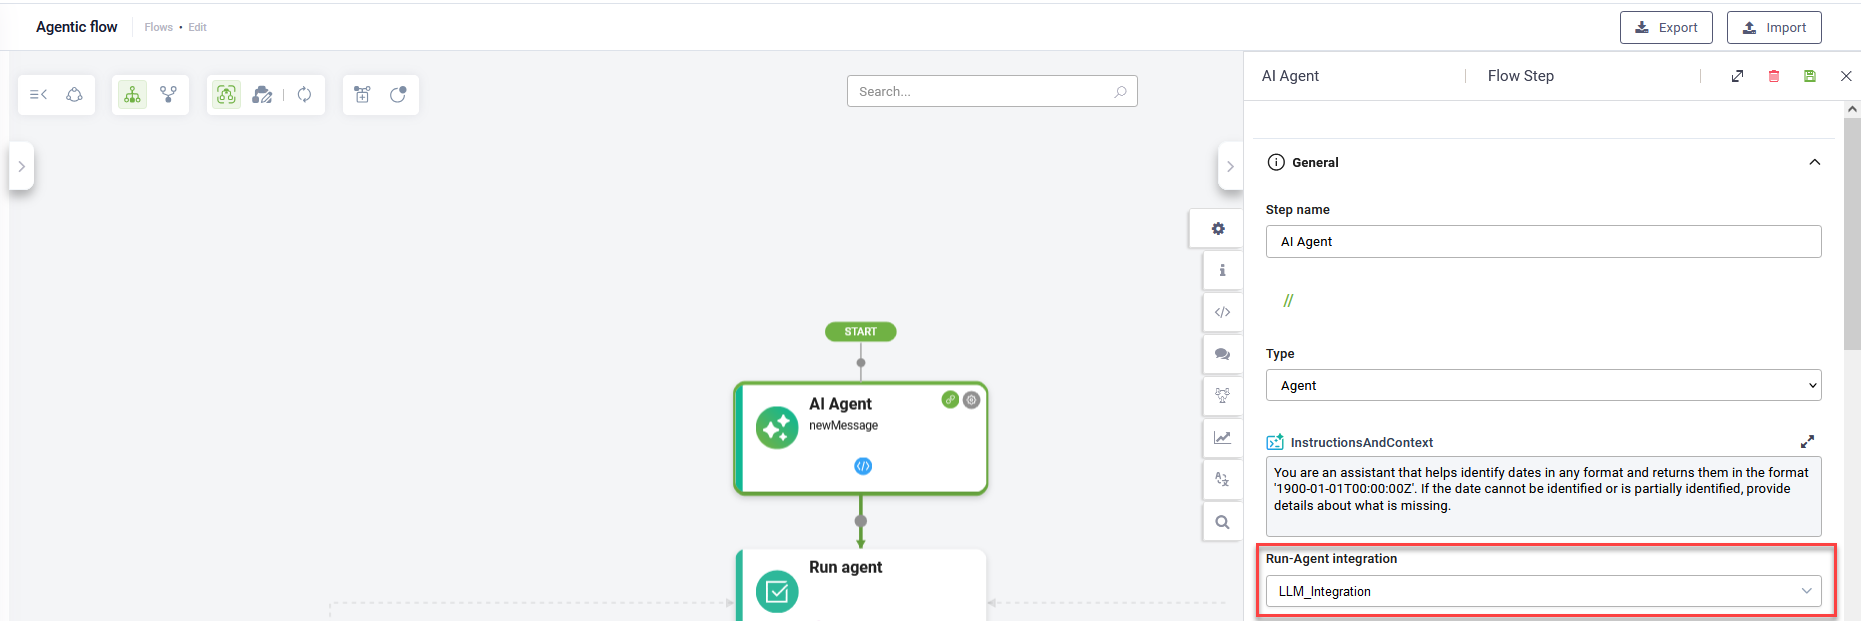
- From the Run-Agent integration field, select the Large Language Model (LLM) integration that your agent will use. This integration should be defined on your [[GPT]] entity and the model should support tooling and function calling. This ensures the AI Agent can effectively interpret your instructions and utilize the functions you've provided.
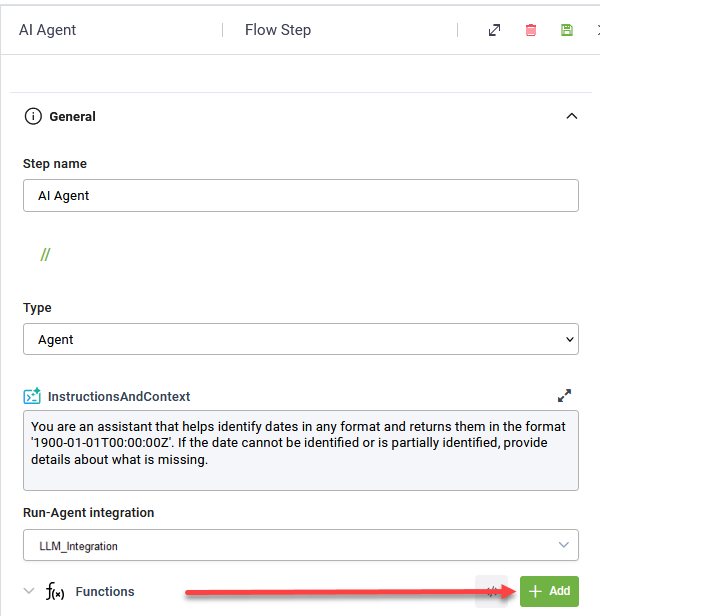
- In the Functions area, define the tools your AI Agent will use to accomplish its goal, by adding functions and their parameters.
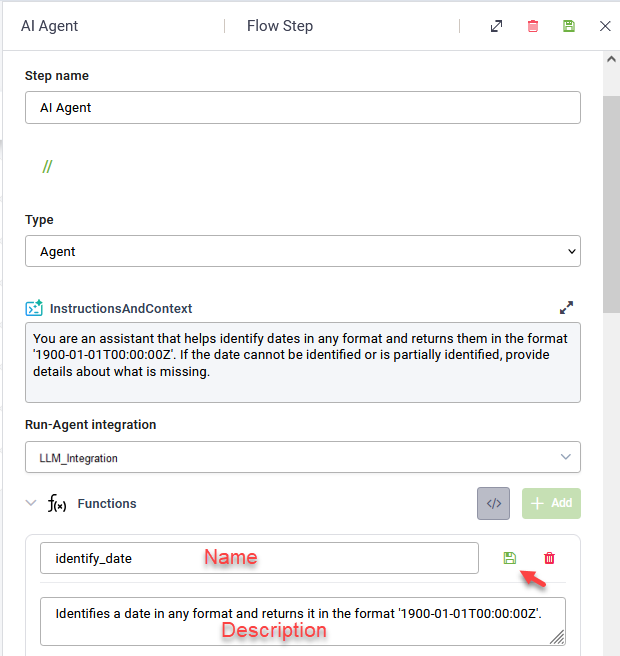
- Click the Add button next to Functions.
- Provide a unique name and a comprehensive description that explains what the function does.
- Click the Save icon to save the function. Now you can add the function parameters.
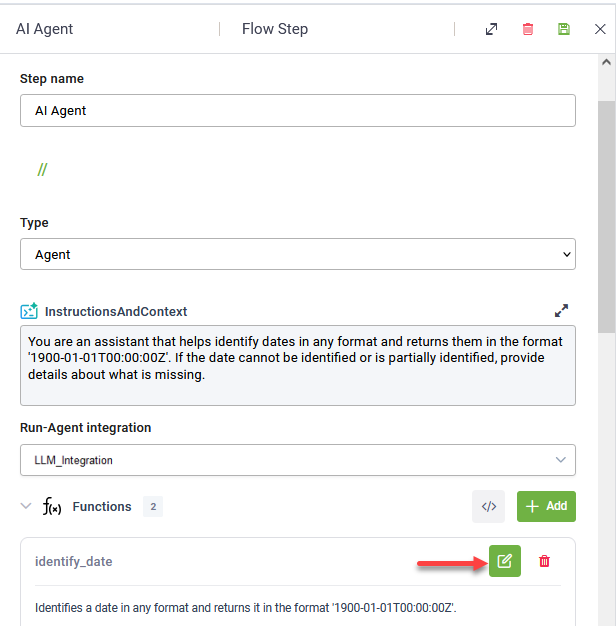
- Click the Edit icon to edit the function.
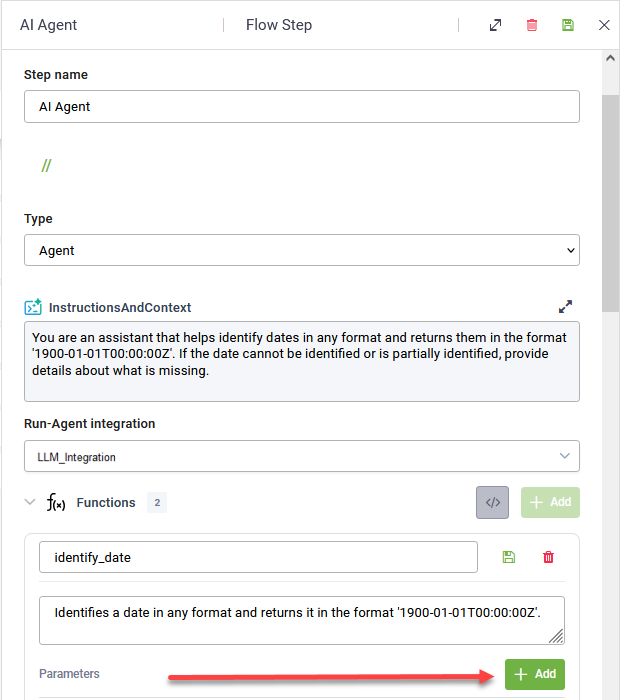
- Click the Add button next to Parameters.
- Provide the parameter properties:
- Name: The name of the parameter the function will use. This should match how the agent refers to the data (e.g., text).
- Type: The data type of the parameter. Select from the drop-down the option depending on the expected input.
- Is Required: Toggle this on if the parameter is mandatory for the function to work.
- Description: A short explanation of what the parameter represents. This helps the LLM understand how to use the parameter correctly.
- Click the Save icon to save the function.
- Save the flow step. The corresponding function handlers appears as a distinct child step under the ‘Functions call’ parent step on the Flow Diagram.
NOTE: For more dynamic instructions, you can leverage the Code Extension section of the step to modify the default system prompt programmatically.
To add a function and its parameters:

Add as many functions and parameters as you need.
Step 2: Configure the Function Handler Steps
Once you've saved your functions within the Agent AI step, corresponding function handler steps will appear as child steps under the 'Functions call' branch on your Flow Diagram (e.g., identify_date, date_not_identified). These handler steps represent the specific actions your agent will take when it decides to execute a particular function.
For each function handler step, you should configure its behavior as needed. We highly recommend adding child flow steps to these handlers, especially if your function involves:
- Integrations with third-party systems: For example, if
identify_dateneeds to call an external date parsing API, you would add an action step with an integration to define that API call. - Additional actions: This could include steps for data manipulation, logging, sending messages to the user based on the function's outcome, or branching the flow further based on the function's success or failure.
By configuring these function handler steps, you define the precise logic and actions that occur when your agent executes a function, ensuring seamless integration with your existing systems and desired conversational flow.
LLM Response Streaming for Voice Interactions
You can enable LLM response streaming to deliver faster, more natural responses in voice interactions. For more information, see Use LLM Response Streaming for Voice Interactions.